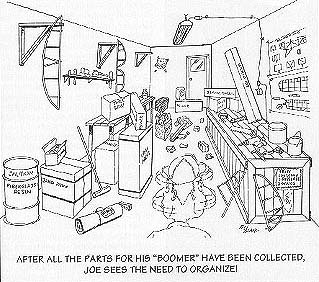
Alright, close your eyes. What image is projected on the wall inside your mind, when the word "Workshop" is said? Does it show a dark garage or basement, a work table with a tired bench grinder sticking up out of a pile of household refuse which includes the empty paint cans from redoing the living room, part of Mary's bicycle and a load of stuff mom didn't know what to do with so it wound up in the workshop?
Is the image one of sparking pristine white walls, neutral gray tiled floors and spotless work benches, tools held magnetically to carefully silk-screened outlines of each and every tool?
Unfortunately, the former is probably closer to most folks' reality and the latter is the dream image. If the homebuilder expects to succeed, he should aim for somewhere in-between, where the workshop is his and only his, but it doesn't present a maintenance problem of its own.
Most people think a work shop is where you go to work. In actuality, when preparing for a project as long as that which a homebuilt airplane represents, the work shop should be where you go to play. Where you go to visit the creative part of yourself that is in love with things that fly. The workshop should be a working environment you would be absolutely willing to call home for 8 hours a day, five days a week for between one and two years. That is the number of hours involved in building a normal homebuilt, 2,000 to 3,000 hours.
The goal in setting up the workshop should be to create a space that you enjoy so much, it literally calls out for you to come visit. Far too often, the work area is overlooked in favor of the work itself, when just a little forethought and effort would create an atmosphere that makes the work move faster and is so pleasant it draws you to the work more often.
Ideally, the shop should be a bright, airy area with lots of sun light, bright walls with pictures of airplanes and a homey feel to it that makes it more like an industrial den than a workshop. Failing that, go for the bright, cheery feel. That can be accomplished in any kind of shop.
If a work shop was boiled down to the essentials they would be space, lights, tables, tools and storage. Before pulling a single piece of the airplane project into the shop, you should walk into it and think about the foregoing five points and how they are going to effect the project. We'll repeat that: Before anything goes into the workshop, the shop itself should be analyzed and re-configured, if necessary.
Space
There aren't a whole lot of us who have the option of building
the ultimate homebuilt workshop. If we did, it would be something
like 40 x 40 feet with lots of big doors and windows. Most of
us have to work with what we have, but, in reality the absolute
minimum should be the size of a double garage, which are usually
30 x 22. The old airplane in the bedroom routine has been done,
but it makes the project much harder to pull off.
Much smaller areas can be used, but they should be the size of the largest part of the airplane, i.e. the fuselage, plus six feet all around it. That barely gives room for benches and walking space. Coincidentally, that is also about the size of a single car garage.
Don't forget this space has to be either heated or cooled, or both, depending on which side of the frigid belt it is located. There is nothing more miserable than to be playing craftsman, while your teeth are chattering or sweat is dripping into the weld. The aim of building a use-friendly workshop is to make it comfortable. Make it so at any time of the day or night, you can walk into it and, in a few minutes, be making wonderful progress.
In most areas that means insulation and plenty of it. Since the assumption is you are capable of learning to build an airplane, it can also probably be assumed you are capable of installing insulation and, if necessary, sheet rock. Don't skimp and don't forget a vapor barrier.
Also don't forget ventilation. A lot of the stuff used in building airplanes not only stinks, but it can be down right dangerous. If much painting is going to be done, a polypropylene sheet can be hung from the ceiling by firring strips and rolled up, like a three sided tent, that can be dropped, when paint is going to be shot. Then a hole needs to be punched in the wall and an exhaust fan installed. And remember, most paint fumes can be explosive, so the fan should be explosion proof.
Storage Space
One of the first things that happens, when building an airplane
is the many small parts that came in separately in boxes gradually
become big parts, as they are nailed, glued, welded together.
If a composite kit is used, big parts show up right off the bat
and there is a space crisis before the project is even started.
There is no such thing as too much storage. Every bit of space has to be utilized, which may include building racks around or across the ceiling. A little temporary building may have to be moved into the backyard. Your kids may have to go live with Uncle Leo in Pittsburg so you can use their bedroom. They'll understand.
Give the storage problem a huge amount of thought ahead of time, since it is a real pain to be constantly stepping over and around stuff that can be easily damaged. Where are the wings going to go, when they are finished? Where will the engine sit until its time to hang it on the airplane for good. Should the wings be built before the fuselage because it is easier to store them than the fuselage?
Get very creative, including utilizing every single square inch under every bench. Check the attic space and any other space in the house that isn't being used and lay claim to it. You'll need it.
'Think you're creative? Convince your spouse an engine would be a great, and novel, decoration in the living room.
Lighting
As with storage, there can never be enough light and the light
works with the color of the walls. If possible, they should be
painted a light color so they reflect the lighting. Besides making
it brighter, it makes the room seem larger.
The ideal situation would be to come up with some four and eight foot fluorescent fixtures. The best source for them is through industrial renovators in the area. Many times, when they wreck or strip a building, the lights are scrapped along with everything else. They sometimes show up for sale as salvage at scrap yards or in local Penny Saver ads. In most metropolitan areas, two tube, eight foot fixtures are a couple dollars a piece. Buy every one you can find.
Your goal in the lighting area is to have it so bright, visitors need sun glasses.
The light goes a long way towards making the area bright and inviting and that is exactly what you want it to be. Inviting.
Get a couple of four foot fixtures and make stands for them so they can be laid on the floor and moved anywhere you want them. Wire them with extension cords.
Lighting should be the most important thing in the shop. Fortunately, it is also the least expensive. If you don't count a couple gallons of paint for the walls, that is.
Tables/benches
A work shop has two categories of work tables. One includes those
on which components are built. Those are temporary and will wind
up either being moved or junked. The second category are those
benches which are permanent.
The unfortunate thing about the benches used for building components is that they have to be straight and level. This is especially true if they are being used to help jig components. The most commonly seen benches of any kind in a workshop use four by four legs and a thick plywood top. These things are heavy and almost never perfectly flat. They are also usually the right size for one job, but entirely wrong for another one.
A possible alternative is to construct some two foot by eight foot panels that are built like big hollow core doors with 3/8" skins glued and screwed to a frame constructed of 2 x 3s that have been specially selected for their straightness. The 2 x 8 panels are actually built as one 4 x 8 unit with both frames bolted together while the top and bottom are glued and screwed on using sheet rock screws. Then they are sawed down the 2 foot dimension. Those panels are fairly light and will never warp, no matter what happens.
Once they are split into 2 x 8 panels, they can either be separate tables, bolted together as a single 4 x 8 or put end to end for a 2 x 16 table. Since they were skinned at one time, the surfaces will usually be true to each other.
If the shop is large enough, the permanent benches can be bolted permanently to the walls as in most work shops. If space is at a premium, rather than using permanent benches which, at some point, are going to be in the way, make them heavy, but so they can be moved with a two wheel cart under one end.
Don't mount a drill press or bench grinder on a permanent bench because sooner or later they will be in the way. Either get an old kitchen base cabinet and put a heavy top on it or make a 2 x 3 foot pedestal table that can be moved around. Mount the vice and grinder on that so it can be moved around the shop to where it will be needed most or put out of the way, when not needed.
Tools
We went through tools in the installment on materials, but we'll
list them one more time. The asterisk indicate options, but options
that should be included if at all possible. It's not necessary
these be bought new. Used is just fine. Also, the Taiwan imports
will build about ten airplanes a piece, so don't worry about their
quality, they are so cheap.
-6 inch vice
-6 inch bench grinder
-3/8 inch hand drill
-Skill saw
-drill press*
-6" x 48" stationary sander*
-power hacksaw* (if working steel fittings)
-welding torch*
-air compressor, 9 cfm* (depends on material)
-spray guns
-riveting equipment (aluminum only)
-Rivet squeaser* (You'll need it sooner or later)
We've said it before and we'll say it again: Homebuilt airplane projects need every bit of help they can get, if they are going to succeed. Practically everything in life works against them, but the one thing that can overcome all obstacles is determination and enthusiasm. That's what spending time building a good workshop is all about; enthusiasm. It is hard to remain enthusiastic if your feet are cold or you can never find anything. It's hard to staying a chipper mood, if the area is dark and damp and cobwebs are constantly in your face.
Just the opposite is true if the area is bright and fairly well organized (most of us are lucky to get our organization up to the "fair" category). A great idea is to hang a cheap portable TV on one wall, which lets you keep up with your favorite program, removes yet another reason for not being in the shop and makes the area a little more like home.
One other thought, by the way: It is important the family realize this is your workshop, not a storage area for bikes, etc. You, on the other hand, have to take their needs in to consideration and find a space for their "stuff." Maybe that's what the outdoor building will be used for. The workshop is your space. A place where you live.
Since the airplane project is going to take a lot of time, it is well worth taking a little time, a couple weeks and making the workshop "the project." Once you've got the workshop right, everything else will flow smoother.
Also, no one uses a workshop once and discards it. Once the
airplane is done the workshop will always be there for other projects.
Like your next airplane. So, the time spent making it a part of
your home is an investment in your future.